Welcome to the world of Jaffa cakes, where indulgence meets simplicity! These delightful treats are not only a perfect snack but also a guilt-free dessert option that everyone in the family can enjoy. With their rich chocolate coating and zesty orange filling, Jaffa cakes offer a burst of flavor that is simply irresistible. Moreover, making them at home allows you to control the ingredients, ensuring a healthier version of this classic favorite. So, whether you’re looking for an energy boost during the day or a sweet ending to your meal, Jaffa cakes are the answer. Let’s dive into the recipe and create these delicious bites together!
Table of Contents
Key Benefits
Jaffa cakes are not just a delicious treat; they also offer several key benefits. These delightful biscuits combine the rich flavor of chocolate with a zesty orange filling, making them a perfect snack for any time of day. Here are some perks you’ll love:
- Guilt-free Indulgence: Jaffa cakes are a lighter dessert option. They provide a sweet fix without the heavy calories of many other treats.
- Energy Boost: The combination of sugar and orange flavor gives you a quick energy lift, making them ideal for an afternoon pick-me-up.
- Family-Friendly: These treats are loved by both kids and adults alike, making them a great addition to family gatherings or snack time.
- Homemade Goodness: Making Jaffa cakes at home allows you to control the ingredients, ensuring a fresher and healthier version of this classic snack.
- Versatile Treat: Whether enjoyed with tea, coffee, or as a standalone snack, Jaffa, cakes fit seamlessly into any occasion.
So, if you’re looking for a delightful dessert or snack, Jaffa cakes are a fantastic choice that everyone can enjoy!
jaffa cakes
Ingredients
Equipment
Method
- Preheat your oven to 180°C (350°F) and line a baking tray with parchment paper.
- In a bowl, mix the sugar, eggs, and zest until light and fluffy. Gradually fold in the flour and baking powder.
- Spoon the mixture into the tray and bake for about 10-12 minutes, or until golden brown. Let them cool completely.
- Combine the orange juice and a little sugar in a saucepan over low heat until it thickens slightly. Allow it to cool.
- Spread the orange jelly over the cooled biscuit base, then melt the chocolate and drizzle it on top.
- Place the Jaffa cakes in the fridge to set before serving.
Notes
| Calories | Fat | Protein | Carbs |
|---|---|---|---|
| 150 | 7g | 2g | 20g |
Ingredients
To create delicious Jaffa cakes, you will need the following ingredients:
- 200g digestive biscuits (or gluten-free alternative)
- 100g dark chocolate (or dairy-free chocolate)
- 100g sugar
- 2 large eggs
- 100g all-purpose flour (or whole wheat flour)
- 1 tsp baking powder
- 100ml orange juice (freshly squeezed for best flavor)
- Zest of one orange
These ingredients come together to create a delightful combination that captures the essence of traditional Jaffa cakes. When selecting your ingredients, remember that quality matters. For instance, using fresh orange juice will enhance the flavor significantly. Additionally, if you prefer a richer chocolate experience, opt for high-quality dark chocolate. This choice will elevate your Jaffa, cakes, making them even more irresistible.
How to Make Jaffa Cakes
Making your own Jaffa cakes is a rewarding experience! Here’s a simple step-by-step guide:
- Preheat your oven to 180°C (350°F) and line a baking tray with parchment paper.
- Prepare the biscuit base: In a bowl, mix the sugar, eggs, and zest until light and fluffy. Gradually fold in the flour and baking powder.
- Bake the bases: Spoon the mixture into the tray and bake for about 10-12 minutes, or until golden brown. Let them cool completely.
- Make the orange filling: Combine the orange juice and a little sugar in a saucepan over low heat until it thickens slightly. Allow it to cool.
- Assemble: Spread the orange jelly over the cooled biscuit base, then melt the chocolate and drizzle it on top.
- Chill: Place the Jaffa, cakes in the fridge to set before serving.
Enjoy your homemade Jaffa cakes as a delightful treat!
Pro Tips, Variations & Common Problems
To ensure your Jaffa cakes turn out perfectly, consider these pro tips:
- Use room temperature ingredients for better mixing. This simple step can make a significant difference in texture.
- Experiment with flavors: Try using lemon or berry jelly for a unique twist. You can also add a hint of vanilla extract to the biscuit base for extra depth.
- For a gluten-free option, substitute regular flour with almond flour or a gluten-free blend. This will maintain the delightful taste while catering to dietary needs.
- Common problems: If your cakes are too dry, reduce baking time slightly. Alternatively, if they stick to the pan, ensure you use enough parchment paper or consider greasing the pan lightly.
- For a shinier chocolate coating, add a teaspoon of vegetable oil to the melted chocolate. This will give your Jaffa cakes a beautiful finish.
- Storage tip: Keep your Jaffa cakes in an airtight container at room temperature. They will stay fresh for up to a week, but I recommend enjoying them within a few days for the best flavor.
These insights will help you create the perfect batch every time! Remember, baking is as much about enjoying the process as it is about the final product. So, have fun experimenting!
Serving Suggestions
Jaffa cakes are not only a delightful treat but also incredibly versatile when it comes to serving. Traditionally enjoyed with a cup of tea, these sweet biscuits can elevate any gathering. Here are some creative ways to serve Jaffa, cakes that will surely impress your guests:
- Tea Time Delight: Pair your Jaffa cakes with a steaming cup of Earl Grey or chamomile tea. The citrus notes of the orange filling complement the floral flavors beautifully.
- Snack Platter: Arrange Jaffa cakes on a colorful platter alongside fresh fruits like strawberries, blueberries, and slices of kiwi. This not only adds a pop of color but also balances the sweetness with fresh, tangy flavors.
- Elegant Dessert: For a more sophisticated presentation, serve Jaffa cakes with a dollop of whipped cream and a sprinkle of orange zest. This adds a creamy texture and enhances the citrus flavor.
- Chocolate Dipping: Melt some extra chocolate and serve it as a dipping sauce. Guests can dip their Jaffa, cakes for an indulgent experience that takes this classic treat to another level.
- Ice Cream Sandwich: For a fun twist, sandwich a scoop of vanilla or orange-flavored ice cream between two Jaffa, cakes. This makes for a refreshing dessert, especially on warm days.
Overall, Jaffa cakes can be enjoyed in numerous ways, making them a perfect addition to any occasion. Whether it’s a casual afternoon snack or a fancy dessert, these delightful biscuits will surely be a hit!
Preserving and Reheating Jaffa Cakes
To enjoy your Jaffa cakes at their best, proper storage and reheating techniques are essential. Firstly, let’s talk about storage. Jaffa, cakes should be kept in an airtight container to maintain their freshness. Ideally, store them in a cool, dry place, away from direct sunlight. If you want to extend their shelf life, consider refrigerating them. In the fridge, they can stay fresh for up to two weeks. Alternatively, for longer storage, you can freeze Jaffa cakes. When properly sealed in a vacuum-sealed bag or an airtight container, they can last for up to three months. However, it’s important to note that freezing may slightly alter their texture. To prevent spoilage or bacterial growth, always ensure that your storage containers are clean and dry before use. Additionally, avoid leaving them out at room temperature for extended periods, especially in warm environments.
Reheating Methods
When it comes to reheating Jaffa cakes, the goal is to preserve their delightful taste and texture. The oven is one of the best methods for this. Preheat your oven to 150°C (300°F). Place the Jaffa, cakes on a baking tray and cover them loosely with aluminum foil. Heat them for about 5-10 minutes, checking frequently to ensure they don’t dry out. Alternatively, if you’re short on time, the microwave can be used. Place a Jaffa cake on a microwave-safe plate and cover it with a damp paper towel. Heat it in 10-second intervals until warm, but be cautious not to overdo it, as this can lead to a chewy texture. If you prefer a crispy finish, the air fryer is a fantastic option. Set it to 160°C (320°F) and heat for about 3-5 minutes. This method will help maintain that delightful crunch. Regardless of the method you choose, adding a touch of moisture, like a small cup of water in the microwave, can help refresh the cakes. By following these simple steps, you can enjoy your Jaffa, cakes just as if they were freshly made!
Conclusion
As you wrap up your journey of making homemade Jaffa cakes, I hope you feel a sense of accomplishment and excitement! This delightful recipe is not only simple but also incredibly versatile, making it a fantastic choice for anyone looking to whip up a delicious treat. Whether you enjoy them as a snack, dessert, or a fun baking project with family, Jaffa, cakes are sure to bring joy to your kitchen. I encourage you to share your thoughts in the comments below or post your creations on social media. I would love to see how your Jaffa, cakes turned out!
Remember, cooking is all about creativity and experimentation. Feel free to play around with different flavors or toppings to make this recipe your own. Perhaps you might try a raspberry jelly instead of orange or add a sprinkle of sea salt on top of the chocolate for an extra flavor boost. The possibilities are endless! So, gather your ingredients, roll up your sleeves, and dive into this fun baking adventure. You won’t regret it!
Lastly, if you have any questions or need tips along the way, don’t hesitate to reach out. I’m here to help you succeed in your culinary endeavors. Enjoy the process, and happy baking!
Frequently Asked Questions about Jaffa Cakes
Welcome to our FAQ section! Here, we address some common questions about Jaffa cakes to help you enjoy this delightful treat even more.
1. What are Jaffa cakes made of?
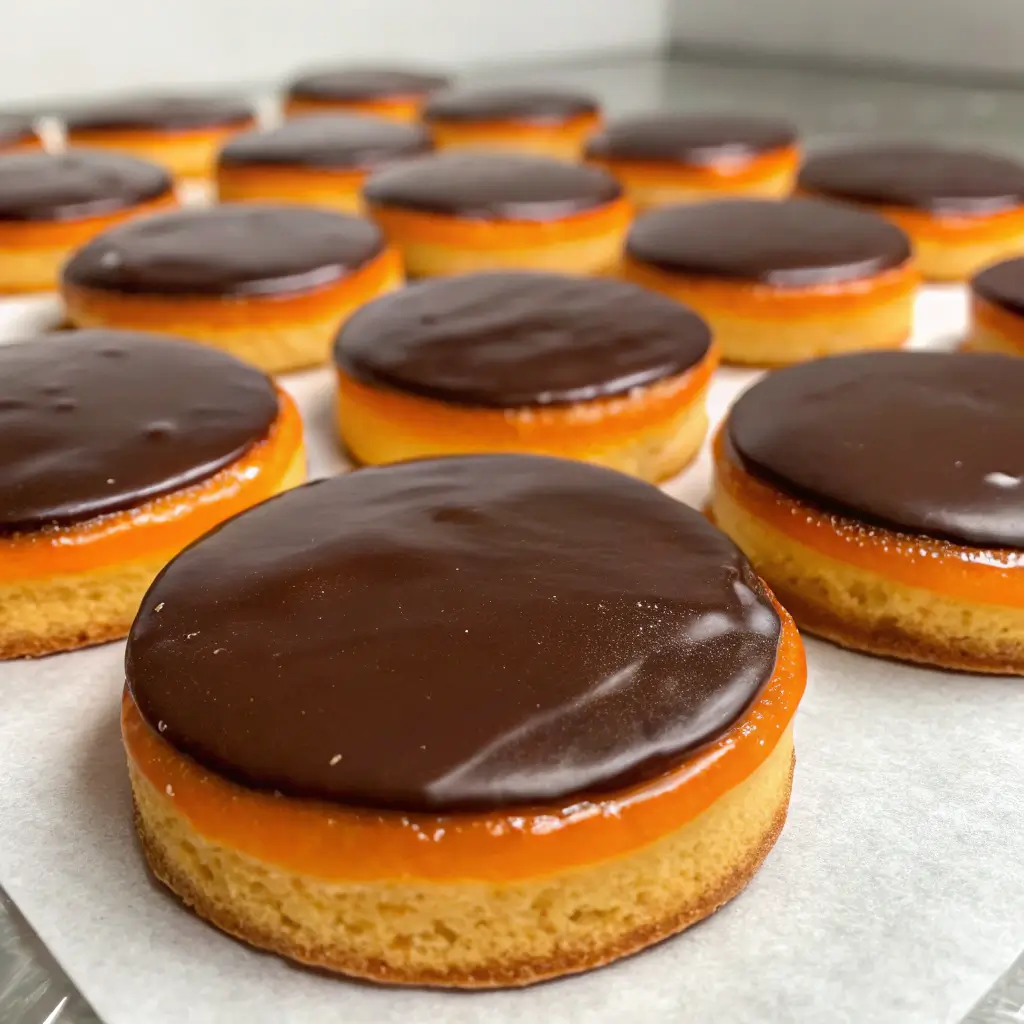
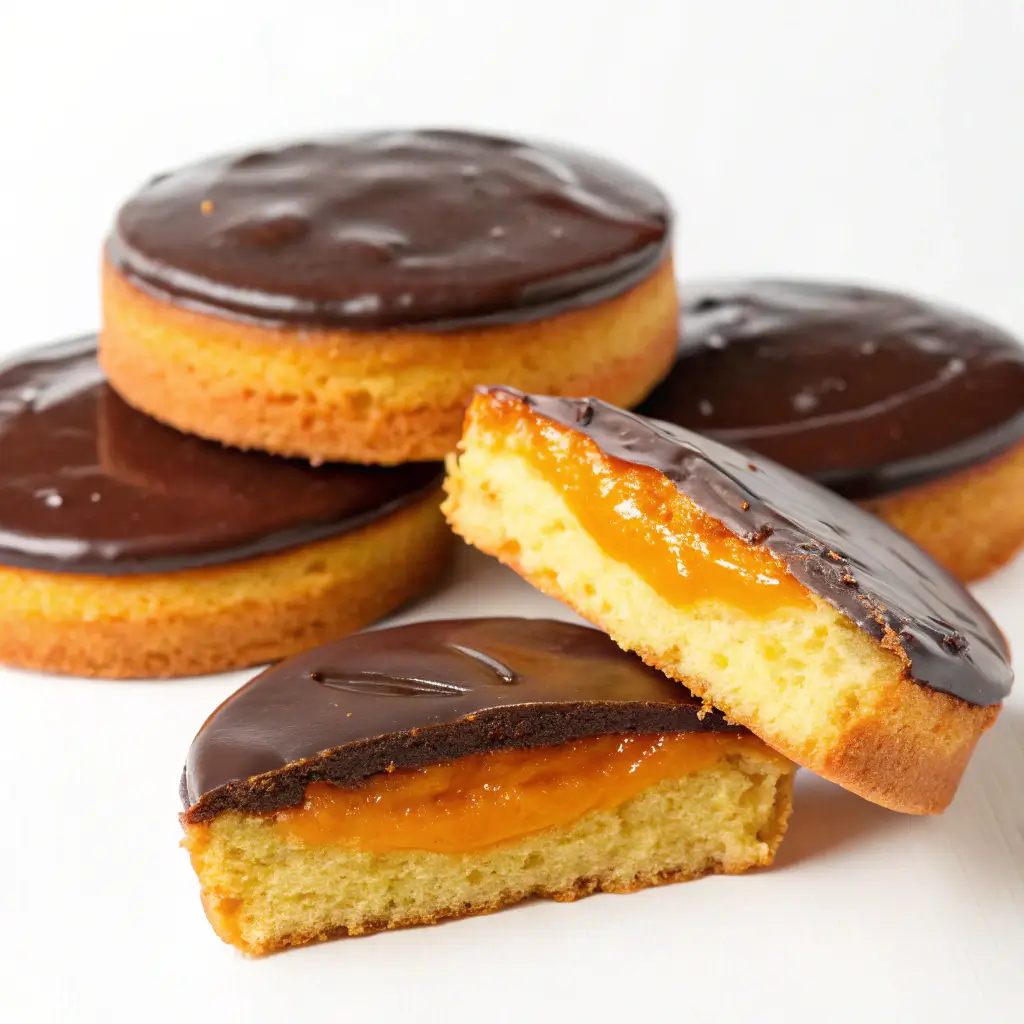
Jaffa cakes are made from a biscuit base, topped with a layer of orange jelly and coated in chocolate. The main ingredients include digestive biscuits, sugar, eggs, flour, baking powder, orange juice, and dark chocolate. This combination creates a delicious treat that’s both sweet and tangy!
2. Are Jaffa cakes gluten-free?
Traditional Jaffa cakes contain gluten due to the use of flour. However, you can easily make gluten-free Jaffa, cakes by substituting regular flour with a gluten-free alternative, such as almond flour or a gluten-free all-purpose blend. This way, everyone can enjoy them!
3. How should I store Jaffa cakes?
To keep your Jaffa cakes fresh, store them in an airtight container at room temperature. They can last for about a week. If you want to keep them longer, consider refrigerating them, but allow them to come to room temperature before serving for the best flavor and texture.
4. Can I freeze Jaffa cakes?
Yes, you can freeze Jaffa cakes! To do this, wrap them individually in plastic wrap and place them in a freezer-safe container. They can be frozen for up to three months. When you’re ready to enjoy them, simply thaw them at room temperature.
5. What can I use instead of orange jelly?
If you prefer a different flavor, you can substitute orange jelly with other fruit jellies, such as raspberry, lemon, or even strawberry. This allows you to customize your Jaffa cakes to suit your taste preferences while still enjoying the delightful chocolate and biscuit combination!