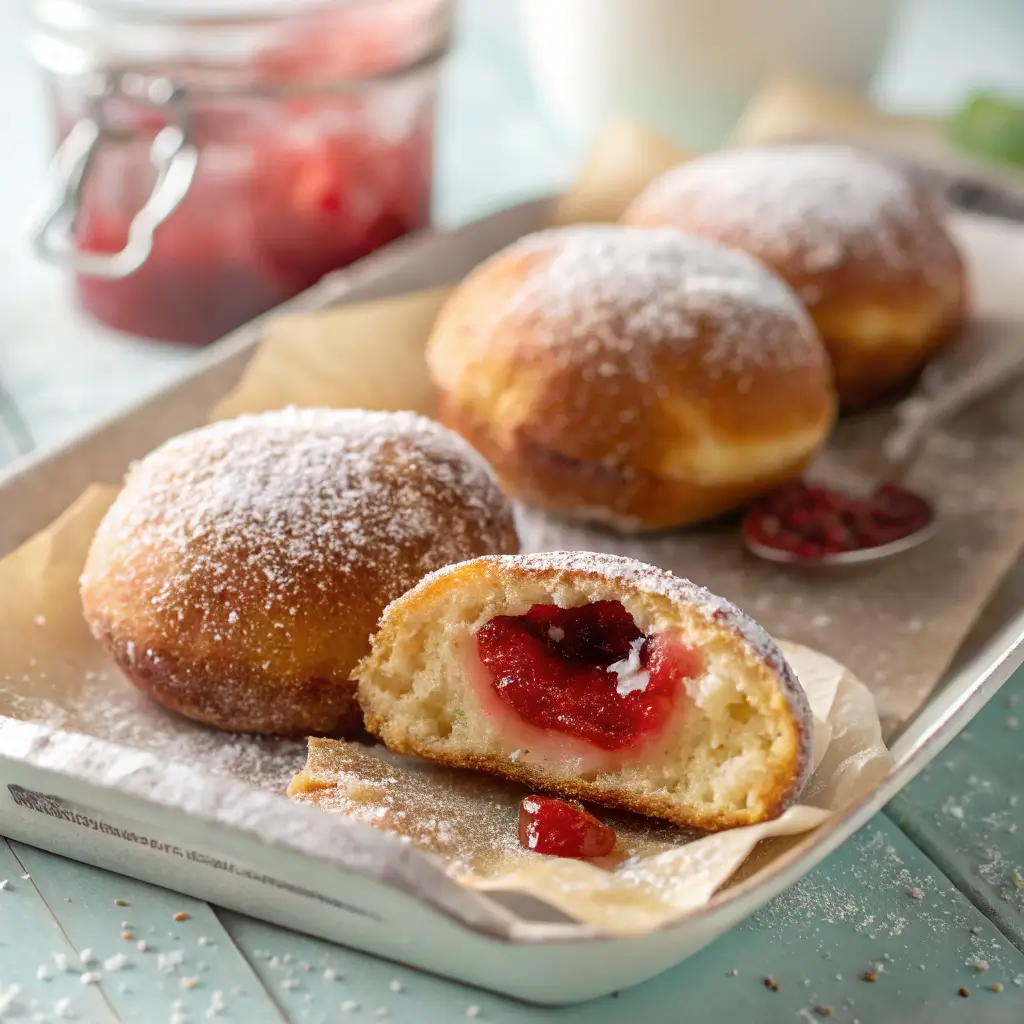
Malasada is a delightful treat that hails from Portuguese cuisine, yet it has become a beloved staple in Hawaii. These fluffy, fried doughnuts are not only delicious but also incredibly versatile. When you take a bite, you’ll experience a warm, soft interior that contrasts beautifully with a crispy exterior. This unique texture is just one reason why malasadas are so special.
Traditionally, malasadas are coated in sugar, but you can also find them filled with various sweet fillings, such as custard or chocolate. This versatility makes them perfect for any occasion, whether it’s a festive celebration or a cozy family gathering. If you’re wondering how to make malasadas, you’re in for a treat! This recipe will guide you through the process, ensuring that you create the perfect batch of these Hawaiian donuts.
Moreover, malasadas are not just a dessert; they can be enjoyed at breakfast or as a snack throughout the day. The aroma of freshly fried dough wafting through your kitchen is simply irresistible. So, gather your ingredients and get ready to indulge in this delightful fried dough experience!
Table of Contents
Key Ingredients Breakdown
To create the perfect malasada, understanding the key ingredients is essential. Each component contributes to the delightful flavor and texture that makes these Hawaiian donuts so irresistible. Here’s a breakdown of the ingredients you’ll need:
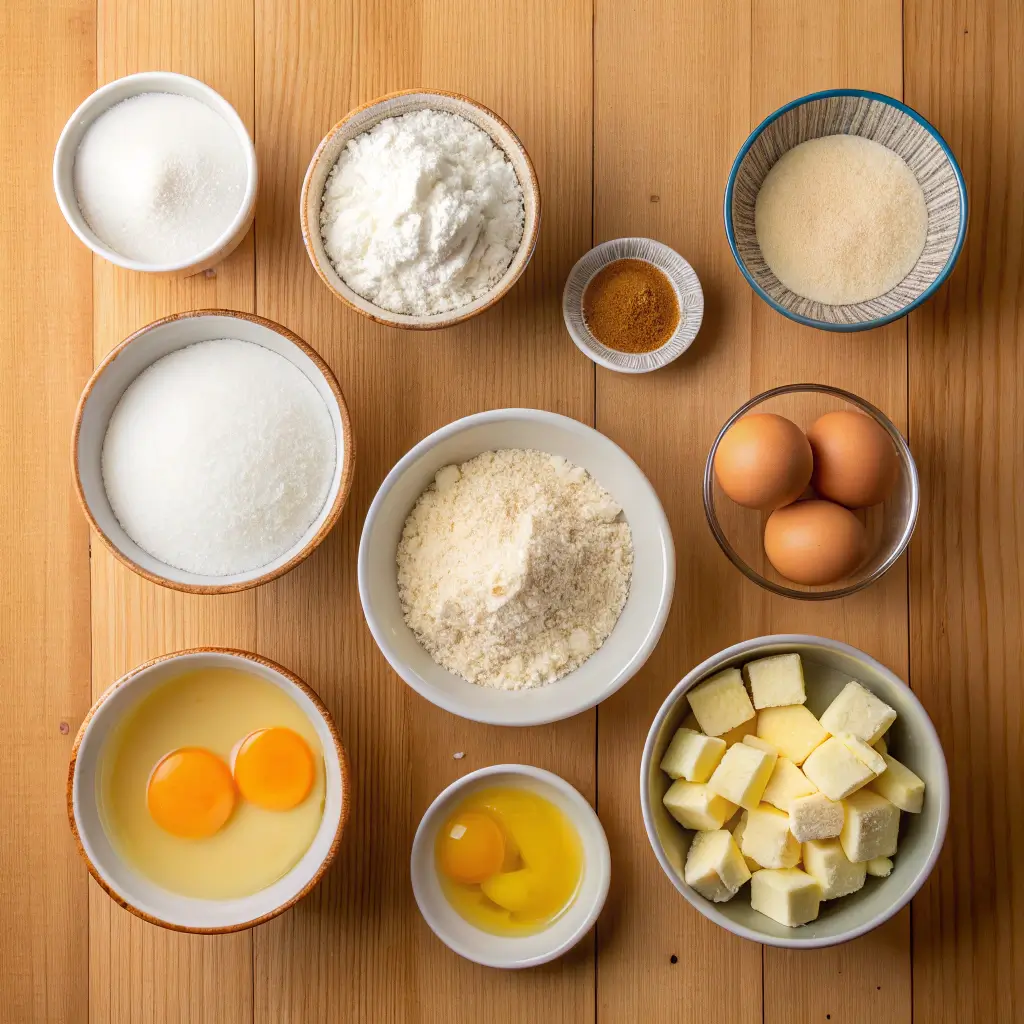
- All-purpose flour – This is the foundation of your malasada, providing structure and chewiness. Opt for high-quality flour for the best results.
- Granulated sugar – Sugar not only sweetens the dough but also helps achieve that golden-brown exterior when fried. Use it generously for a delightful taste.
- Yeast – This ingredient is crucial for leavening, giving your malasadas their light and airy texture. Always check the expiration date for optimal performance.
- Milk – Milk adds richness and moisture to the dough. For a creamier texture, consider using whole milk or even coconut milk for a tropical twist.
- Eggs – Eggs enrich the dough, contributing to its flavor and color. They also help bind the ingredients together, ensuring a smooth consistency.
- Butter – Melted butter enhances the flavor and adds a lovely richness to the malasadas. Use unsalted butter to control the saltiness of your dough.
- Salt – A pinch of salt balances the sweetness and enhances the overall flavor profile. Don’t skip this ingredient!
- Vegetable oil – This is essential for frying your malasadas. Choose a neutral oil with a high smoke point for the best frying experience.
- Powdered sugar – For dusting, powdered sugar adds a sweet finish to your malasadas. It’s the perfect touch to make them look as good as they taste.
By selecting high-quality ingredients, you’ll ensure that your malasadas are not only delicious but also memorable. Each bite will be a delightful experience, showcasing the unique flavors of this traditional m’alasada recipe.
Essential Equipment for the Perfect malasada
To create the most delightful malasada, having the right equipment is crucial. Each tool plays a significant role in ensuring your Hawaiian donuts turn out perfectly fluffy and delicious. Here’s a list of essential equipment you’ll need:
- Mixing Bowls: A set of mixing bowls in various sizes is essential. You’ll use them for combining ingredients and allowing the dough to rise. Opt for glass or stainless steel, as they are easy to clean and durable.
- Whisk: A whisk is perfect for blending your wet ingredients smoothly. It helps incorporate air into the mixture, which is vital for achieving that light texture in your malasadas.
- Measuring Cups and Spoons: Accurate measurements are key when making a malasada recipe. Invest in a good set of measuring cups and spoons to ensure you get the proportions just right.
- Stand Mixer or Hand Mixer: While you can mix by hand, a stand mixer or hand mixer makes the process much easier. It saves time and ensures your dough is mixed thoroughly, which is important for the final texture.
- Frying Thermometer: To achieve the perfect fried dough, maintaining the right oil temperature is crucial. A frying thermometer will help you monitor the heat, ensuring your malasadas are golden brown and not greasy.
- Slotted Spoon: This tool is essential for removing your m’alasadas from the hot oil. It allows excess oil to drain off, keeping your Hawaiian donuts light and fluffy.
- Cooling Rack: After frying, place your malasadas on a cooling rack. This prevents them from becoming soggy and helps maintain their delightful texture.
- Pastry Bag (optional): If you plan to fill your malasadas, a pastry bag will make the process much easier. It allows for precise filling without making a mess.
By gathering these tools, you’ll be well on your way to mastering how to make malasadas. Each piece of equipment contributes to the overall success of your traditional m’alasadas, ensuring they are a hit with family and friends. So, get ready to fry up some deliciousness!
Step-by-Step Cooking Instructions
Making malasadas is a delightful experience that results in delicious, fluffy treats. Follow these simple steps to create your own batch of traditional malasadas that will impress your family and friends.
- Prepare the Dough: In a large mixing bowl, combine 1 cup of warm milk, 1/4 cup of sugar, and 2 packets of active dry yeast. Stir gently and let it sit for about 5 minutes until it becomes frothy. This step is crucial because it activates the yeast, ensuring your m’alasadas rise beautifully.
- Add the Eggs: Once the yeast mixture is ready, add 2 large eggs and 1/4 cup of melted butter. Mix everything together until well combined. The butter adds richness, while the eggs contribute to the fluffy texture of the malasadas.
- Incorporate the Dry Ingredients: Gradually add 4 cups of all-purpose flour and a pinch of salt to the wet mixture. Stir until a soft dough forms. At this point, you may notice the dough is slightly sticky, which is perfectly fine.
- Knead the Dough: Transfer the dough to a floured surface and knead for about 5-7 minutes. This process develops the gluten, giving your m’alasadas that perfect chewy texture. If the dough sticks to your hands, sprinkle a little more flour as needed.
- Let It Rise: Place the kneaded dough in a greased bowl, cover it with a clean kitchen towel, and let it rise in a warm place for about 1-2 hours, or until it doubles in size. This step is essential for achieving light and airy m’alasadas.
- Shape the Malasadas: After the dough has risen, punch it down to release the air. Then, divide it into small pieces, about the size of a golf ball. Roll each piece into a smooth ball and place them on a floured surface. Allow them to rest for another 30 minutes.
- Heat the Oil: In a deep pot or fryer, heat vegetable oil to 350°F (175°C). It’s important to maintain the right temperature, as this ensures your malasadas fry evenly and develop a golden-brown crust.
- Fry the Malasadas: Carefully drop a few dough balls into the hot oil, making sure not to overcrowd the pot. Fry them for about 2-3 minutes on each side, or until they are golden brown. Use a slotted spoon to remove them and place them on paper towels to drain excess oil.
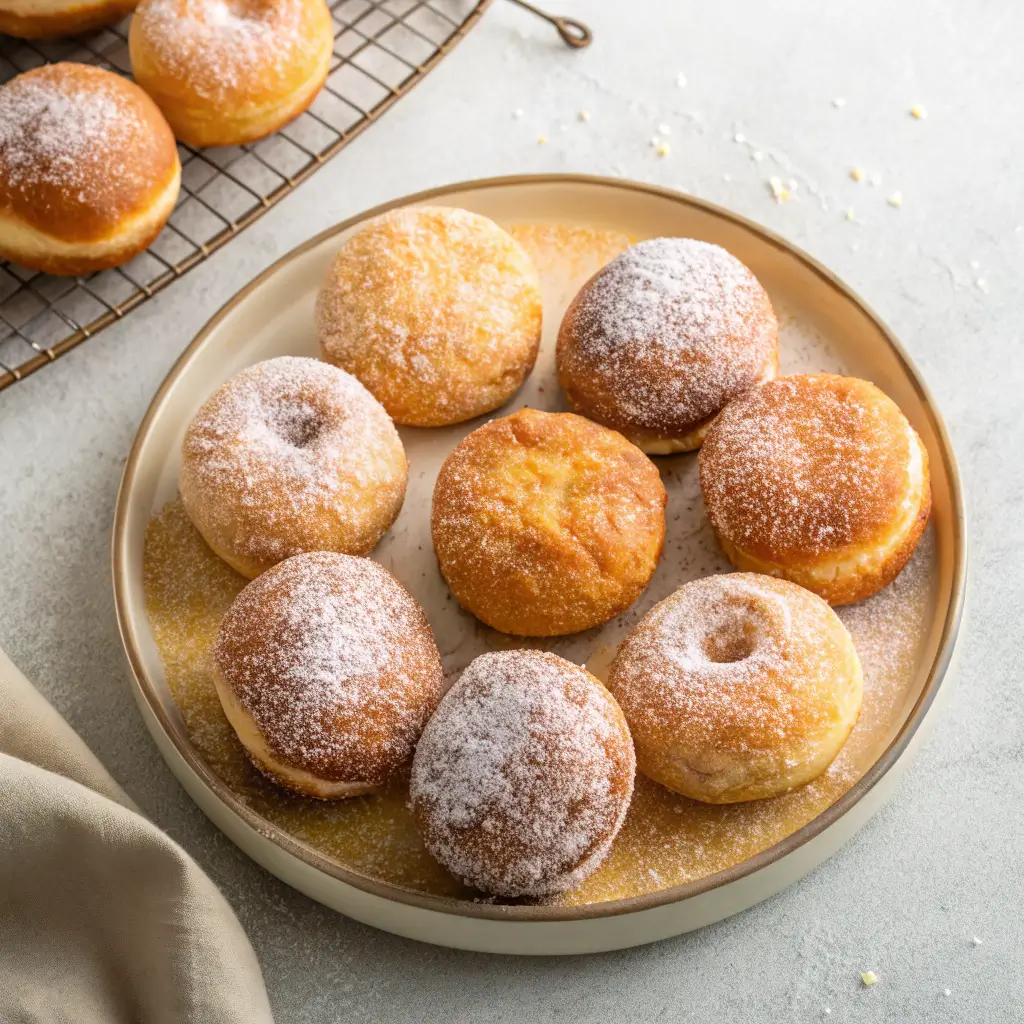
- Coat with Sugar: While the malasadas are still warm, roll them in granulated sugar. This step adds sweetness and enhances the overall flavor of your m’alasadas.
- Serve and Enjoy: Finally, serve your freshly made m’alasadas warm. You can enjoy them plain or fill them with your favorite jam or custard for an extra treat. These Hawaiian donuts are sure to be a hit!
By following these steps, you’ll master how to make malasadas that are not only delicious but also a fun project in the kitchen. Enjoy the process and the delightful results!
Pro Tips and Chef Secrets
To elevate your malasada game, consider these insider tips. Firstly, use high-quality ingredients. Fresh eggs and premium flour can significantly enhance the flavor. Additionally, ensure your yeast is active. This is crucial for achieving that perfect rise.
Another key point is to let your dough rest adequately. Allowing it to rise for at least an hour will result in a fluffier texture. Moreover, when frying, maintain the oil temperature between 350°F and 375°F. This ensures your m’alasadas are golden brown and not greasy.
For flavor, don’t hesitate to experiment with spices. A pinch of nutmeg or cinnamon can add a delightful twist. Also, consider infusing your sugar with vanilla or citrus zest for an extra layer of taste.
When shaping your m’alasadas, keep them uniform in size. This helps them cook evenly. Furthermore, if you want a crispy exterior, dust them with sugar immediately after frying. This creates a delightful contrast with the soft interior.
Lastly, always taste your dough before frying. This way, you can adjust sweetness or spice levels as needed. By following these tips, you’ll master the art of making traditional m’alasadas that are sure to impress!

malasada
Ingredients
Equipment
Method
- In a large mixing bowl, combine warm milk, sugar, and yeast. Stir gently and let it sit for about 5 minutes until frothy.
- Add eggs and melted butter to the yeast mixture. Mix until well combined.
- Gradually add flour and salt to the wet mixture. Stir until a soft dough forms.
- Transfer the dough to a floured surface and knead for about 5-7 minutes.
- Place the dough in a greased bowl, cover, and let it rise for 1-2 hours until doubled in size.
- Divide the dough into small pieces, roll into balls, and let them rest for another 30 minutes.
- Heat vegetable oil to 350°F (175°C) in a deep pot or fryer.
- Fry dough balls for 2-3 minutes on each side until golden brown. Remove and drain on paper towels.
- Roll warm malasadas in granulated sugar.
- Serve warm, plain or filled with jam or custard.
Notes
| Calories | Fat | Protein | Carbs |
|---|---|---|---|
| 200 | 8g | 3g | 30g |
Nutritional Information & Benefits
Malasadas are not only delicious but also offer some interesting nutritional insights. Typically, one m’alasada contains approximately 200-300 calories. This can vary based on the size and ingredients used. Additionally, they usually have around 10-15 grams of fat, which contributes to their rich flavor and texture.
In terms of protein, a malasada provides about 2-4 grams. While this may seem modest, it adds to the overall nutritional profile. Furthermore, these delightful treats contain carbohydrates, primarily from the flour and sugar, which can range from 30-40 grams per serving.
It’s important to note that malasadas are often fried, which can increase their calorie count. However, they are a delightful indulgence that many enjoy on special occasions. If you have dietary restrictions, be aware that traditional m’alasadas may contain gluten and dairy. Therefore, if you’re looking for alternatives, consider using gluten-free flour or dairy-free milk.
Overall, while malasadas are a treat, they can be enjoyed in moderation. They are perfect for sharing with friends and family, especially during celebrations. So, when you learn how to make m’alasadas, remember to savor each bite and appreciate their unique flavor and texture!
Creative Variations & Substitutions
Malasadas are incredibly versatile, allowing you to customize them to your taste. Here are some creative variations and substitutions to consider:
Dairy-Free Options
If you’re looking for dairy-free m’alasadas, simply substitute regular milk with almond or coconut milk. Additionally, use dairy-free butter or margarine in the dough. This way, you can enjoy the same delicious flavor without the dairy.
Flavor Twists
To elevate your malasada experience, consider adding different flavorings. For instance, you can mix in vanilla extract or almond extract for a unique twist. Alternatively, try incorporating citrus zest, such as lemon or orange, for a refreshing taste.
Stuffed Malasadas
Another fun variation is to stuff your malasadas. You can fill them with custard, chocolate, or fruit preserves. This adds an exciting surprise in every bite, making your m’alasadas even more delightful.
Gluten-Free Malasadas
If you need a gluten-free option, use a gluten-free flour blend. This substitution allows you to enjoy traditional malasadas without compromising on texture or flavor. Just ensure that your other ingredients are also gluten-free.
Seasonal Flavors
Consider seasonal flavors to keep things interesting. For example, during fall, you can add pumpkin spice to the dough. In summer, try incorporating fresh berries into the batter for a fruity touch.
Overall, malasadas can be tailored to suit your preferences. Whether you choose to go dairy-free, experiment with flavors, or try stuffing them, the possibilities are endless. So, get creative and enjoy making your own unique m’alasadas!
Serving Ideas & Pairings
Malasadas are not just delicious on their own; they can be elevated with creative serving ideas and perfect drink pairings. Firstly, consider dusting your malasadas with a generous coating of powdered sugar or cinnamon sugar for an extra touch of sweetness. Additionally, you can drizzle them with chocolate or caramel sauce for a decadent twist. For a tropical flair, serve them with a side of fresh fruit, such as pineapple or mango, which complements the rich flavor of the m’alasadas beautifully.
When it comes to plating, arrange your malasadas on a colorful plate or a rustic wooden board. This not only enhances their visual appeal but also makes for a delightful presentation. You might also consider garnishing with mint leaves or edible flowers to add a pop of color and freshness.
As for drink pairings, malasadas pair wonderfully with a variety of beverages. For instance, a hot cup of coffee or a refreshing iced tea can balance the sweetness of the m’alasadas. If you prefer something fruity, a tropical smoothie or a glass of fresh lemonade can be a perfect match. Moreover, for a more indulgent experience, try serving them with a scoop of vanilla ice cream or whipped cream on the side.
In summary, whether you enjoy them as a snack or a dessert, malasadas can be customized to suit your taste. With these serving ideas and drink pairings, you can create a delightful experience that showcases the unique charm of these Hawaiian donuts. So, gather your friends and family, and enjoy your homemade m’alasadas together!
Storage & Reheating Tips
Storing your malasadas properly is essential to maintain their delightful texture and flavor. First, allow them to cool completely before storing. This prevents moisture buildup, which can make them soggy. Next, place the m’alasadas in an airtight container. You can also use a resealable plastic bag, ensuring to remove as much air as possible. For optimal freshness, store them at room temperature for up to two days. If you need to keep them longer, consider freezing them.
To freeze your malasadas, wrap each one individually in plastic wrap. Then, place them in a freezer-safe bag or container. This method helps preserve their taste and texture. You can freeze them for up to three months. When you’re ready to enjoy your m’alasadas again, simply remove them from the freezer and let them thaw at room temperature.
Reheating is just as important to keep your malasadas delicious. For the best results, use an oven or an air fryer. Preheat your oven to 350°F (175°C). Place the malasadas on a baking sheet and heat for about 5-10 minutes. This method helps restore their crispy exterior. Alternatively, if you’re using an air fryer, set it to 350°F (175°C) and heat for about 3-5 minutes.
Microwaving is another option, but it can make the malasadas chewy. If you choose this method, heat them in short intervals of 10-15 seconds. Always check to avoid overheating. Overall, with these storage and reheating tips, you can enjoy your m’alasadas just as much as when they were freshly made!
Frequently Asked Questions
Curious about malasadas? You’re not alone! Here are some common questions answered.
What is a malasada?
A malasada is a delicious fried dough treat, often coated in sugar. These delightful pastries are similar to Hawaiian donuts and Portuguese donuts, making them a beloved dessert in many cultures.
How do you make malasadas at home?
To make malasadas at home, you’ll need a simple m’alasada recipe. Start by mixing flour, sugar, yeast, and eggs. Then, fry the dough until golden brown. Finally, coat them in sugar for that perfect finish!
What is the origin of malasadas?
Malasadas originated in Portugal, where they were traditionally made for special occasions. They were brought to Hawaii by Portuguese immigrants, where they became a popular treat, especially during festivals.
How are malasadas traditionally served?
Traditionally, malasadas are served warm and dusted with sugar. You can enjoy them plain or filled with custard, chocolate, or fruit. They pair wonderfully with coffee or tea, making them a delightful snack any time of day.
Conclusion
In conclusion, malasadas are not just a treat; they are a delightful experience. These Hawaiian donuts, with their fluffy texture and sweet flavor, are sure to impress anyone who tries them. Whether you’re making traditional m’alasadas or experimenting with creative variations, the joy of frying dough is unmatched. Moreover, sharing these delicious pastries with friends and family can create lasting memories. So, gather your ingredients and essential tools, and dive into the world of malasadas. You’ll find that making these delightful treats is both rewarding and fun. Ultimately, once you master the art of malasadas, you’ll want to make them again and again. Enjoy your cooking adventure, and happy frying!