
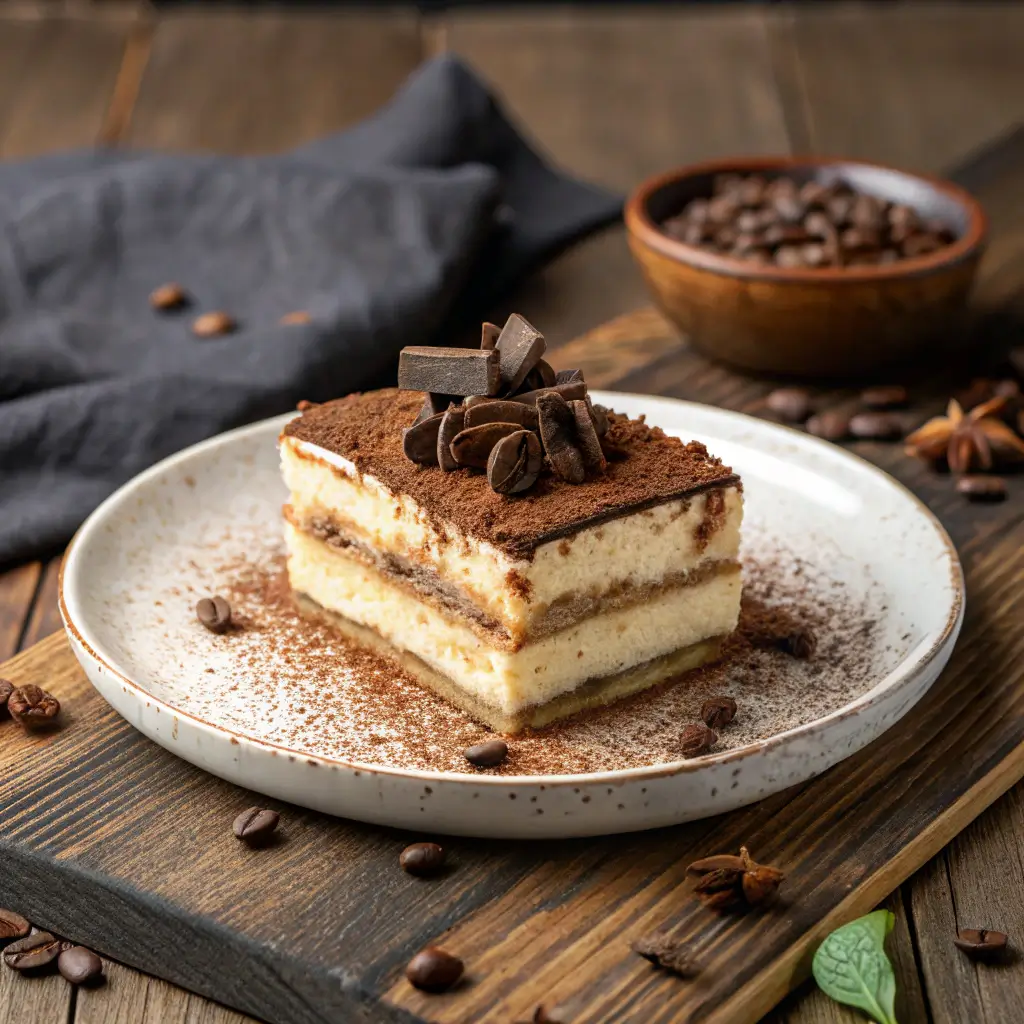
Welcome to a delightful journey into the world of desserts with this irresistible tiramisu cake recipe! This classic Italian treat is not only a feast for the eyes but also a celebration of rich coffee flavors and a creamy texture that will leave you wanting more. Whether you’re hosting a gathering or simply indulging yourself, this easy-to-make dessert is sure to impress. Moreover, its no-bake nature means you can whip it up quickly, allowing you to spend more time enjoying the company of loved ones. So, let’s dive into the layers of flavor and learn how to create this crowd-pleaser that’s perfect for any occasion!
Table of Contents
Key Benefits
If you’re looking for a dessert that’s not only delicious but also easy to make, then this Tiramisu Cake Recipe is your answer! Here’s why you’ll love it:
- Dessert Indulgence: This cake is a true indulgence, combining rich coffee flavors with a creamy texture that melts in your mouth.
- Easy Preparation: You don’t need to be a baking expert! This Tiramisu Cake Recipe is straightforward, allowing you to whip it up in no time.
- No-Bake Option: Yes, you read that right! This dessert doesn’t require baking, which means less time in the kitchen and more time enjoying with friends and family.
- Crowd-Pleaser: Whether it’s a birthday party or a casual get-together, this cake is sure to impress your guests. Everyone loves a good Tiramisu!
- Versatile Dessert: You can easily customize this recipe. Add chocolate shavings, fresh fruit, or even a hint of almond extract to make it your own.
- Rich Taste: The combination of espresso and mascarpone cheese creates a flavor profile that’s both rich and satisfying, making it a perfect ending to any meal.
In summary, this Tiramisu Cake Recipe is not just a treat for your taste buds; it’s also a practical choice for any occasion. So, gather your ingredients and get ready to impress!
tiramisu cake recipe
Ingredients
Equipment
Method
- 1. Whip the Cream: Start by pouring 1 cup of heavy cream into a mixing bowl. Using an electric mixer, whip the cream until stiff peaks form. This will take about 3-5 minutes. Make sure your cream is very cold for the best results.
- 2. Mix the Mascarpone: In a separate bowl, combine 1 cup of mascarpone cheese, 1 cup of sugar, and 1 teaspoon of vanilla extract. Mix until smooth and creamy. This step is crucial for achieving that rich, creamy texture.
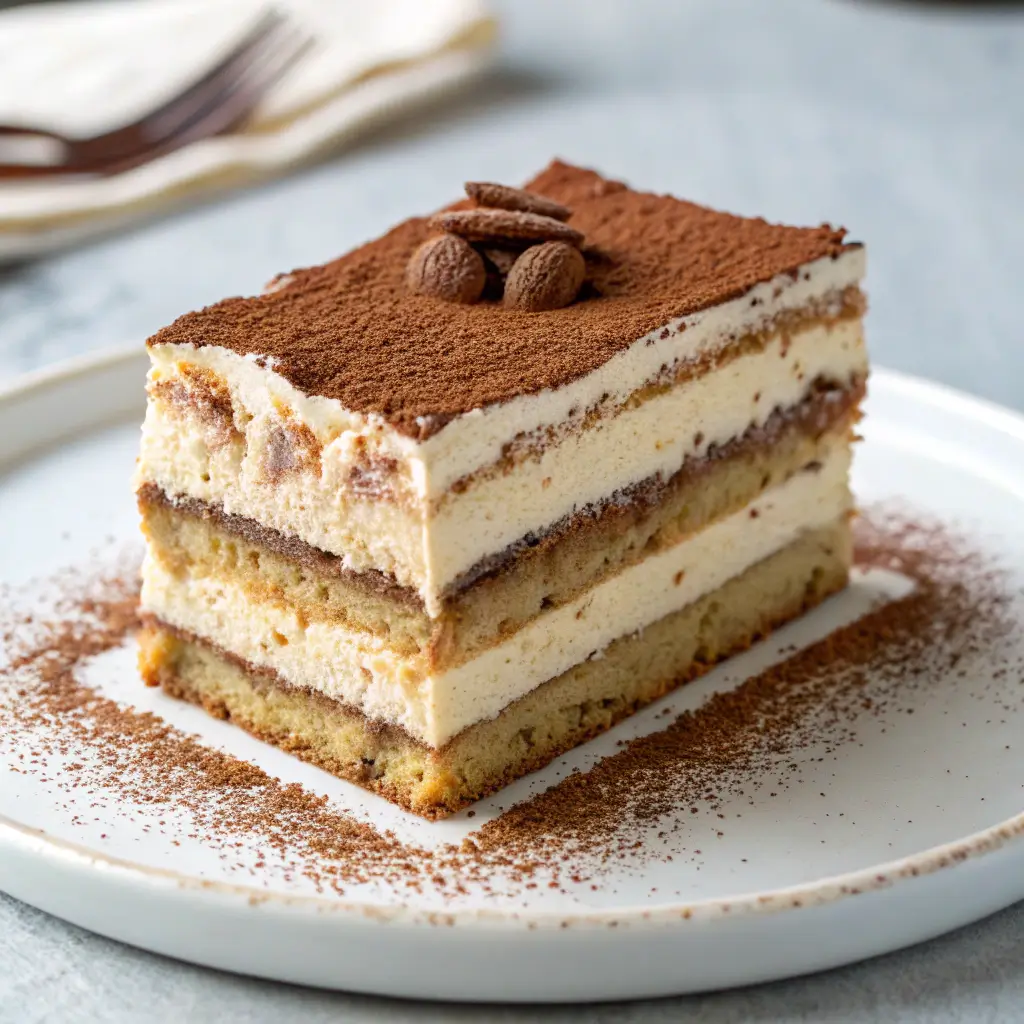
- 3. Fold the Mixtures: Gently fold the whipped cream into the mascarpone mixture. Do this carefully to maintain the lightness of the whipped cream. This folding technique ensures a fluffy filling.
- 4. Prepare the Ladyfingers: Brew 1 cup of espresso and let it cool. Dip each ladyfinger into the cooled espresso briefly. Be careful not to soak them too long, as soggy ladyfingers can ruin the texture.
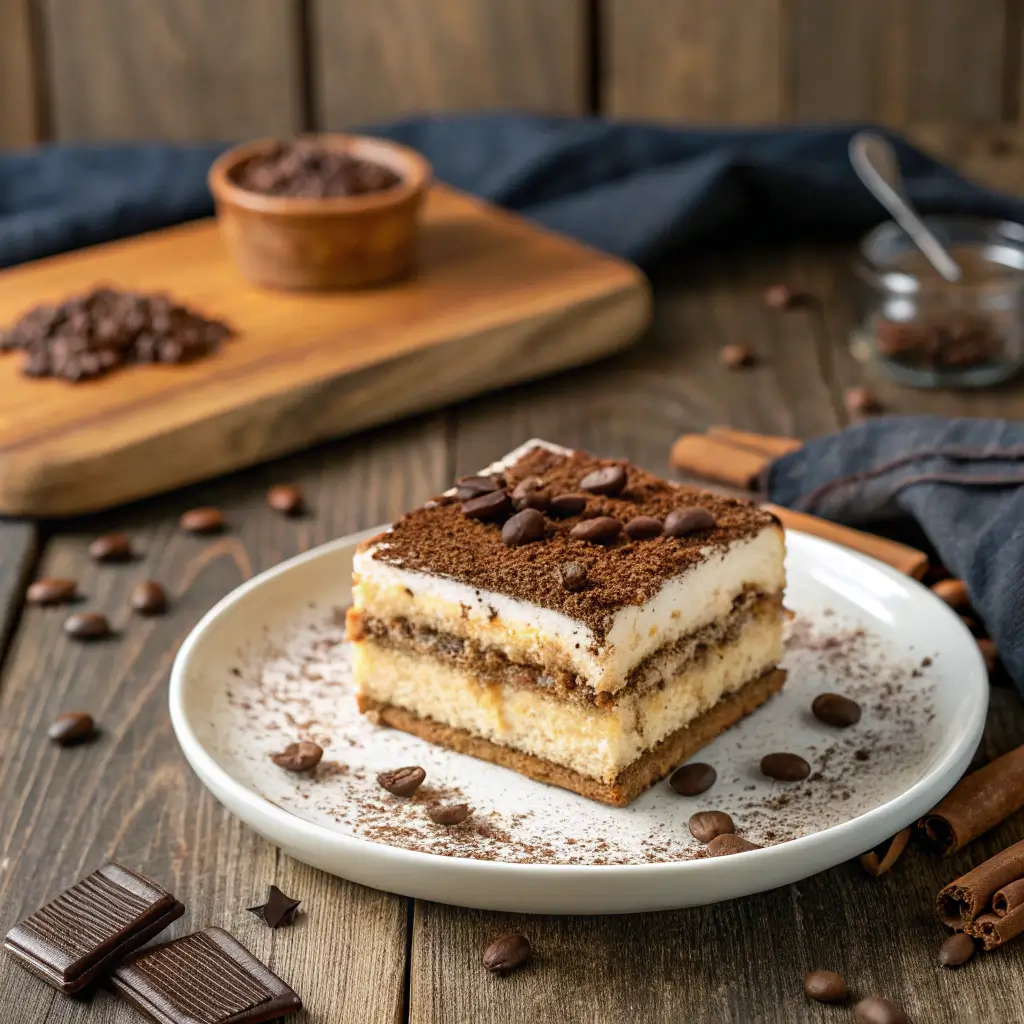
- 5. Layer the Cake: In a rectangular dish, start layering. Place a layer of dipped ladyfingers at the bottom. Then, spread a generous layer of the mascarpone mixture over the ladyfingers. Repeat this process until all ingredients are used, finishing with a layer of mascarpone on top.
- 6. Chill the Cake: Cover the dish with plastic wrap and refrigerate for at least 4 hours, or preferably overnight. Chilling allows the flavors to meld beautifully, enhancing the overall taste.
- 7. Dust with Cocoa: Before serving, dust the top of the cake with unsweetened cocoa powder for that classic Tiramisu finish. You can also add chocolate shavings for an extra touch of elegance.
Ingredients
To create this delectable Tiramisu Cake Recipe, you will need the following ingredients:
- 1 cup mascarpone cheese
- 1 cup brewed espresso (cooled)
- 1 cup sugar
- 1 cup heavy cream
- 1 teaspoon vanilla extract
- 1 package of ladyfingers
- Unsweetened cocoa powder for dusting
- Optional: Dairy-free substitutes such as cashew cream or coconut milk for a vegan version.
Each ingredient plays a vital role in achieving that classic tiramisu flavor. Firstly, the mascarpone cheese provides a rich, creamy texture that is simply irresistible. Additionally, the brewed espresso infuses the cake with deep coffee flavors, creating that signature taste we all adore. The sugar balances the bitterness of the espresso, while the heavy cream adds a lightness that makes each bite melt in your mouth.
When selecting ladyfingers, look for high-quality ones, as they will absorb the espresso beautifully without becoming too soggy. Furthermore, don’t hesitate to experiment with dairy-free options if you prefer a vegan twist. This flexibility makes the Tiramisu Cake Recipe not only delicious but also versatile, catering to various dietary preferences.
In summary, gathering these ingredients is the first step toward creating a dessert that is not only a crowd-pleaser but also a delightful indulgence. So, let’s get started on this journey to make a stunning Tiramisu Cake Recipe!
How to Make Tiramisu Cake Recipe
To create your delicious Tiramisu Cake Recipe, follow these simple steps for a delightful dessert experience:
- Whip the Cream: Start by pouring 1 cup of heavy cream into a mixing bowl. Using an electric mixer, whip the cream until stiff peaks form. This will take about 3-5 minutes. Make sure your cream is very cold for the best results.
- Mix the Mascarpone: In a separate bowl, combine 1 cup of mascarpone cheese, 1 cup of sugar, and 1 teaspoon of vanilla extract. Mix until smooth and creamy. This step is crucial for achieving that rich, creamy texture.
- Fold the Mixtures: Gently fold the whipped cream into the mascarpone mixture. Do this carefully to maintain the lightness of the whipped cream. This folding technique ensures a fluffy filling.
- Prepare the Ladyfingers: Brew 1 cup of espresso and let it cool. Dip each ladyfinger into the cooled espresso briefly. Be careful not to soak them too long, as soggy ladyfingers can ruin the texture.
- Layer the Cake: In a rectangular dish, start layering. Place a layer of dipped ladyfingers at the bottom. Then, spread a generous layer of the mascarpone mixture over the ladyfingers. Repeat this process until all ingredients are used, finishing with a layer of mascarpone on top.
- Chill the Cake: Cover the dish with plastic wrap and refrigerate for at least 4 hours, or preferably overnight. Chilling allows the flavors to meld beautifully, enhancing the overall taste.
- Dust with Cocoa: Before serving, dust the top of the cake with unsweetened cocoa powder for that classic Tiramisu finish. You can also add chocolate shavings for an extra touch of elegance.
By following these steps, you’ll have a stunning Tiramisu Cake Recipe that’s not only easy to prepare but also a guaranteed crowd-pleaser. Enjoy your homemade dessert with family and friends!
Pro Tips, Variations & Common Problems
Creating the perfect Tiramisu Cake Recipe can be a delightful journey, but it’s essential to keep a few chef secrets in mind. Here are some pro tips and variations to elevate your dessert game:
Pro Tips
- Firstly, ensure your heavy cream is very cold before whipping. This helps achieve those perfect stiff peaks that give your Tiramisu its luxurious texture.
- Additionally, for a richer flavor, consider using freshly brewed espresso. The quality of your coffee can significantly impact the overall taste.
- Moreover, when dipping ladyfingers in espresso, do so briefly. If you soak them too long, they can become soggy, which is a common mistake.
- Furthermore, if you want to enhance the flavor profile, try adding a splash of almond extract or a hint of orange zest to the mascarpone mixture.
- Lastly, for a beautiful presentation, dust the top with cocoa powder just before serving to keep it looking fresh.
Creative Variations
- For a chocolate twist, incorporate layers of chocolate ganache between the mascarpone layers. This adds a decadent richness that chocolate lovers will adore.
- Alternatively, consider adding fresh fruit layers, such as strawberries or raspberries, for a refreshing contrast to the creamy texture.
- If you prefer a lighter version, swap out the heavy cream for whipped coconut cream for a dairy-free delight.
- Another fun variation is to infuse the espresso with flavored syrups, such as hazelnut or caramel, to create a unique taste experience.
Common Problems & Solutions
- If your Tiramisu is too runny, it may be due to over-whipping the cream or not chilling it long enough. Ensure you whip the cream until stiff peaks form and allow adequate chilling time.
- Conversely, if your layers are too dense, you might have overmixed the mascarpone. Gently fold the whipped cream into the mascarpone to maintain a light texture.
- In case your ladyfingers are too soggy, remember to dip them quickly in the espresso. A quick dip is all they need to absorb just the right amount of moisture.
- Lastly, if the flavors seem muted, consider letting the Tiramisu sit overnight. This resting period allows the flavors to meld beautifully, enhancing the overall taste.
By following these tips and variations, you’ll be well on your way to mastering your Tiramisu Cake Recipe. Enjoy the process, and remember, practice makes perfect!
Serving Suggestions
When it comes to serving your Tiramisu Cake Recipe, tradition plays a delightful role. This classic Italian dessert is typically enjoyed chilled, allowing the flavors to meld beautifully. Here are some engaging serving suggestions that will surely impress your guests:
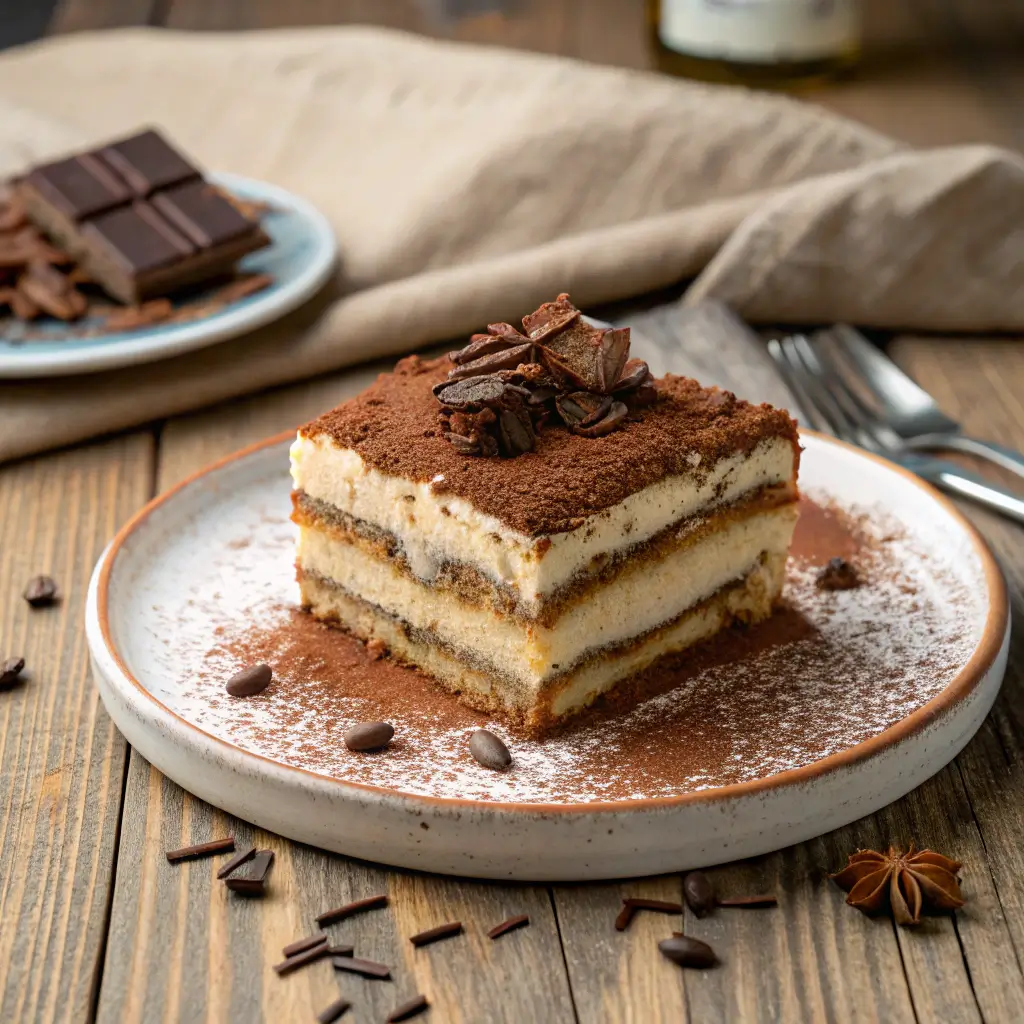
- Elegant Presentation: Dust the top of your Tiramisu Cake Recipe with unsweetened cocoa powder just before serving. This not only enhances its visual appeal but also adds a rich, chocolatey aroma that invites indulgence.
- Garnish with Style: Consider adding chocolate shavings or curls on top for an extra touch of sophistication. Fresh mint leaves can also provide a pop of color and a refreshing contrast.
- Pair with Fresh Fruits: Serve slices alongside fresh berries, such as strawberries or raspberries. The tartness of the fruit beautifully balances the creamy texture of the cake, creating a delightful flavor combination.
- Accompany with Ice Cream: A scoop of vanilla or coffee-flavored ice cream can elevate your dessert experience. The cold creaminess of the ice cream complements the rich layers of the Tiramisu Cake Recipe perfectly.
- Individual Servings: For a more personalized touch, consider serving the Tiramisu Cake in individual cups or jars. This not only makes for a charming presentation but also allows each guest to enjoy their own portion.
- Drizzle with Chocolate Sauce: A light drizzle of chocolate or caramel sauce can add an extra layer of flavor. This sweet addition can make your Tiramisu Cake Recipe even more irresistible.
Overall, these serving suggestions will not only enhance the visual appeal of your Tiramisu Cake Recipe but also create a memorable dining experience for your guests. Whether it’s a special occasion or a casual family gathering, this dessert is sure to be a crowd-pleaser!
Preserving and Reheating Tiramisu Cake
To ensure your Tiramisu Cake Recipe remains a delightful treat, proper storage is essential. First, cover the cake tightly with plastic wrap or transfer it to an airtight container. This will help maintain its creamy texture and rich flavors. Store it in the refrigerator, where it will stay fresh for up to 4 days. If you want to keep it longer, consider freezing individual portions. Wrap each piece securely in plastic wrap and then place it in a freezer-safe bag. In this way, it can last for about 2 months. When storing, always remember to label your containers with the date to keep track of freshness. Additionally, to prevent spoilage or bacterial growth, avoid leaving the cake at room temperature for more than 2 hours.
Reheating Methods
When it comes to reheating your Tiramisu Cake, the goal is to preserve its delightful taste and texture. The best method is to allow it to come to room temperature naturally. Simply remove it from the refrigerator and let it sit for about 30 minutes before serving. However, if you prefer to warm it slightly, you can use the microwave. Place a slice on a microwave-safe plate and cover it with a damp paper towel to add moisture. Heat it on low power for about 10-15 seconds, checking frequently to avoid overheating. Alternatively, if you want to use the oven, preheat it to 300°F (150°C). Place the cake in an oven-safe dish, cover it with foil, and warm it for about 10 minutes. This method helps maintain the cake’s integrity without drying it out. Remember, Tiramisu is best enjoyed chilled, so avoid overheating it. By following these simple steps, you can enjoy your Tiramisu Cake Recipe just as deliciously as the day it was made!
Conclusion
As you wrap up your culinary adventure with this Tiramisu Cake Recipe, remember that you’ve just created a delightful dessert that beautifully combines rich coffee flavors and a creamy texture. This recipe is not only simple but also incredibly versatile, making it a fantastic choice for any occasion. I encourage you to share your thoughts or results in the comments below; I would love to hear how your Tiramisu turned out!
Moreover, don’t hesitate to experiment with variations or pairings that suit your taste. Perhaps you might add a hint of chocolate or even some fresh fruit layers for a unique twist. Cooking should always be a fun and creative process, and this Tiramisu Cake Recipe is an excellent canvas for your culinary creativity. So, gather your ingredients, roll up your sleeves, and dive into this delicious recipe!
Finally, if you have any questions or need further tips, feel free to reach out. Remember, every great chef started somewhere, and with each attempt, you’ll only get better. Enjoy your Tiramisu Cake Recipe, and happy baking!
FAQs
Here are some common questions about the Tiramisu Cake Recipe that might help you on your baking journey!
1. Can I make Tiramisu Cake ahead of time?
Absolutely! In fact, making it a day in advance is recommended. This allows the flavors to meld beautifully. Just remember to cover it tightly with plastic wrap and store it in the refrigerator.
2. What can I use instead of mascarpone cheese?
If you need a substitute, you can use cream cheese mixed with a bit of heavy cream. Alternatively, a dairy-free option like cashew cream works well too. Just ensure it has a similar creamy texture for the best results.
3. How do I prevent the ladyfingers from getting too soggy?
To avoid soggy ladyfingers, dip them in the espresso quickly. A brief dip is all you need; otherwise, they will absorb too much liquid. This way, they’ll maintain their structure and provide a nice texture.
4. Can I add flavors to my Tiramisu Cake?
Definitely! You can enhance the flavor by adding a splash of almond extract or using flavored coffee. Additionally, chocolate shavings or a sprinkle of cinnamon can elevate the taste even further.
5. How should I store leftover Tiramisu Cake?
To store leftovers, cover the cake tightly with plastic wrap and keep it in the refrigerator for up to four days. If you want to keep it longer, you can freeze individual portions. Just make sure they are well-wrapped to prevent freezer burn.

It would be great if you actually stated in the recipe what size pan to make this in. All you say is “rectangular” – are you talking about a 9 x 13?
“Thank you so much, Tawnie! You’re absolutely right — I should have specified the pan size. A 9×13-inch rectangular pan works best for this tiramisu. I’ll update the recipe to make it clearer. Really appreciate your helpful feedback!”